


 EN
EN ES
ES FR
FR IT
ITHow to choose your projection screen?
Often considered a secondary accessory, the projection screen plays an essential role in producing bright images with clear contrast. The projection screen must be selected and considered with the same degree of care and attention as the video projector itself, in order that you can be certain that its installation will function optimally. The screen plays an essential role in determining the final projection quality. Depending on your budget, it is often wise to select a less expensive model of video projector, accompanied by a good quality screen, rather than a very good video projector without a screen; projected onto a wall.
We are going guide you in the selection of your projection screen in 4 STEPS:
We are going guide you in the selection of your projection screen in 4 STEPS:
- Type of screen: manual, motorised, tensioned, built-in, in a frame, whiteboard, portable…
- Projection format: 16/10, 16/9, 4/3, 2/1 and 1/1,
- Screen dimensions: defining the size of the image properly,
- Type of canvas.
Category:

Step 1 - Type of screen
Depending on your requirements and your budget, there are several types of projection screen available.

A manual screen is a roll-down solution that is fixed to the wall and/or ceiling. Uses: private individuals, professionals (offices, schools…)
There are 3 types of manual screen:
> Simple manual screen: the canvas locks in the lowest position by means of a hook attached to the wall. The height of the screen is not adjustable.
> Manual Autolock screen: the canvas automatically locks at the desired height (without the use of a hook on the wall). The height of the screen is therefore adjustable. The locking of the screen requires manual intervention.
> Manual Autolock screen + SRC (slow return control system): the canvas locks automatically at the desired height (without the use of a hook on the wall). The height of the screen is therefore adjustable. The additional advantage is that the closing away of the screen becomes automatic. This optional system is called SRC (Slow Return Control). In fact, a simple flick of your wrist at the bottom of the screen and your canvas will slowly close automatically, without any further intervention on your part. This type of screen is slightly more expensive than the first two, however, ultimately what you get is increased reliability and comfort..
Advantages: economical, simple installation, no cable.
* Non-tensioned screens are naturally susceptible to curling at the edges. A maximum tolerance of 3% of the total width of each of the sides is accepted.

The motorised screen is a solution that rolls down electrically and is controlled by a remote control or wall switch. The motorised projection screen is also attached to the wall and/or ceiling. Uses: private individuals, professionals (offices, schools…)
> Tubular motor: the tubular motor is quieter and more reliable than a synchronised motor.
> RF (Radio Frequency) or IR (Infra Red) remote control: an RF remote control is more practical as you do not have to point the transmitter in order to activate the motor.
> Casing (metallic part containing the canvas and motor) black or white, to suit varying installations.
Advantages: simple control, precise adjustment, different sizes possible, up to very large dimensions.
* Non-tensioned screens are naturally susceptible to curling at the edges. A maximum tolerance of 3% of the total width of each of the sides is accepted.

If you want to integrate the screen and make the installation as discrete as possible, then a version with a recessed casing is what you are looking for.
Uses: private individuals (Home Cinema), professionals (offices, meeting rooms…)
What’s more, you also provide the motor and the canvas with optimal protection from all environmental contamination (dust, smoke, heat...). The recessed screen and tensioned recessed screen are perfectly suited for home cinemas.
The casing is fixed to the ceiling with threaded rods. Using the radio frequency remote control, you will have no problem controlling the lowering and raising of the canvas. A precision installation is essential. We recommend that the installation be performed by two people (or that you call in a professional). To facilitate maintenance, side flaps grant access to the electrical connectors.
Advantages: aesthetic appearance, precise adjustment, simple control
* Non-tensioned screens are naturally susceptible to curling at the edges. A maximum tolerance of 3% of the total width of each of the sides is accepted.

Motorised projection screens referred to as “tensioned” or “self-tensioning” are also attached to the wall or ceiling. Uses: Home Cinema.
The features (motor, remote control, black drop) are the same as for classic motorised screens. However, they offer one additional advantage.
Tensioned motorised screens incorporate an automatic canvas tensioning system. They have a cable on either side of the screen that tensions the canvas and thus eliminates any potential risk of rippling. The projected image will thus be of better quality than with a manual or classic motorised screen. The canvas is different to that of a classic motorised screen.
It is finer and more flexible in order to be brought to as high a tension as possible, for a superior image quality. On the other hand, you can choose a black casing, which is ideal in a dark room dedicated to projection, without any risk of reflecting the lights, thus interfering with the projection. These “tensioned” motorised screens are highly sought after amongst home cinema enthusiasts.
With or without a black drop? The black drop (or extra drop) is the black band above the projection area, generally measuring between 30 and 70 cm, which enables the screen to be made compatible with different room heights, and the lowering of the centre of your image. This is an option that can prove very useful if you have a high ceiling. We also have all-white canvas screens for multi-format images. Utilisations : Home Cinéma.

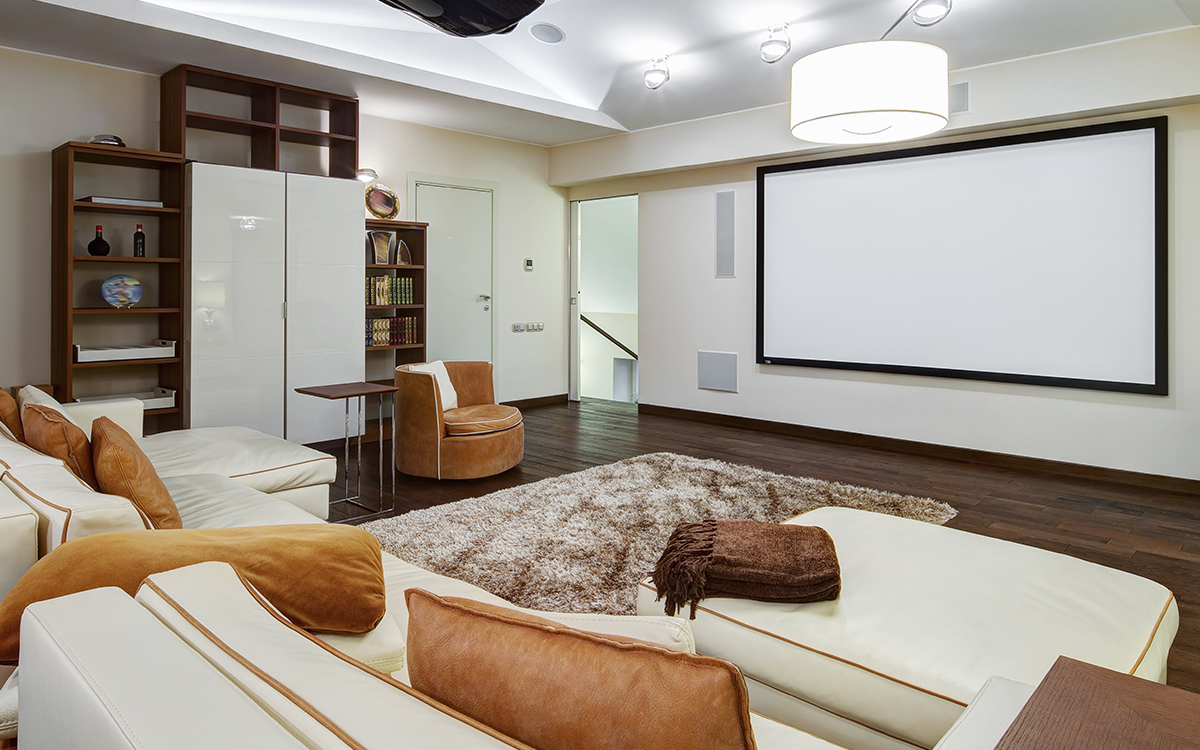
Framed screens are a fixed solutions intended for installation on a wall, like a picture. This type of screen with a fixed frame is designed to be installed in a room that is dedicated exclusively to projection, both at home and in the office. Uses: Home cinema, meeting room
Advantage: the screen is always ready for use and the entire installation is aesthetically pleasing. The sides of the frame are made of aluminium and are generally covered in black velvet (the use of black velvet prevents the image from being reflected on the edges of the frame during projection, which can be very annoying). The width of the black frame varies between 86 cm and 6.5 cm for standard frames, and as small as 1.8 cm for the range of ultra-fine screens, also referred to as Slim screens.
The canvas is perfectly flat, for unparalleled image quality. The canvas is different to that of a classic screen, and is identical to that found on tensioned motorised screens. It is finer and more supple, so that it can be easily tensioned. This tension is exerted by springs located inside the frame, and all the way around the canvas. A frame screen thus enables a perfectly flat screen, with no ripples whatsoever.
The frame screen remains the best solution compared to the other types of screen presented above. However, its size and the fact that it is permanently visible require a room dedicated especially to projection. Frame screens are also highly appreciated by lovers of home cinema, and are increasingly being used within a professional setting.
PORTABLE SCREENS
Portable screens are designed to be used during a one-off audiovisual presentation, and can be set up and taken down quickly. Depending on the type of service, the desired size of screen and your budget, various types of portable screen are available:
Portable screens are designed to be used during a one-off audiovisual presentation, and can be set up and taken down quickly. Depending on the type of service, the desired size of screen and your budget, various types of portable screen are available:

> Tripod screen: the tripod screen is the most economical.
Advantages: economical, instant setup, Highly mobile (cover available), different sizes and formats possible.
Advantages: economical, instant setup, Highly mobile (cover available), different sizes and formats possible.

> Pull-up screen: the canvas is rolled inside its carry case. Place the casing on the floor, pull the canvas . It stays up by itself.
Advantages: the setup of the screen is extremely simple and instantaneous. In addition, the height of the screen is adjustable, and it locks at the desired height.
Advantages: the setup of the screen is extremely simple and instantaneous. In addition, the height of the screen is adjustable, and it locks at the desired height.

> Case screen: case screen supplied with its own transport case: it consists of an aluminium structure onto which the canvas is fastened with press studs. Once dismantled, the entire screen is stored inside its case.
Advantages: this screen is available for FRONT or REAR projection. In addition, it allows you to produce very large images(up to 6 metres wide). Flatness of the canvas, height-adjustable. Variety of formats.
Advantages: this screen is available for FRONT or REAR projection. In addition, it allows you to produce very large images(up to 6 metres wide). Flatness of the canvas, height-adjustable. Variety of formats.
Step 2 - Projection format
The format is the ratio between the width and the height of the image. For example, for an image that is 2 metres wide, if the format is 16:9 then the height will be 1.13m (image dimensions: 2 x 1.13m). To achieve a better result, it is recommended that you use a screen with the same format as the projected image. There are different projection formats:
16:10 Computer format, for office use.
16:9 Home cinema use and high-definition TV. 16:9 has become the current stands, and most-used, format.
4:3 For mixed use.
2:1 for office use.
1:1 for versatile use (institutions, education, companies…). Depending on the unrolled height, all formats are possible.
CALCULATION EXAMPLE FOR THE PROJECTION DISTANCE
Before purchasing your equipment, it is important to define the size of the image based on your video projector and the projection distance, or, inversely, the projection distance based on your image size and your video projector.
Minimum projection distance = image width x minimum ratio = 3 x 1.95 = 5.85 m
Maximum projection distance = image width x maximum ratio= 3 x 2.15 = 6.45 m

CALCULATION EXAMPLE FOR THE SIZE OF THE SCREEN
Minimum image width = projection distance / maximum ratio = 4 / 2.15 = 1.86 m
Maximum image width = projection distance / minimum ratio = 4 / 1.95 = 2.05 m
TYPE OF PROJECTION FRONT: the video projector is placed in front of the canvas
REAR: the video projector is placed behind the canvas (if used as part of a set, for example). A translucent grey canvas is used in this case.
Step 3 - Dimensions of the screen
The dimensions of the projection screen will depend on various criteria, such as: the resolution of your video projector and its power, the dimensions of your projection room, the distance at which the viewers are located, and your personal comfort (for example, in a cinema some people like to sit further forward than others).
It is therefore impossible to establish an exact rule to determine the size of your projection screen. The most effective solution therefore remains to install your video projector and test several image sizes directly on the wall, in order to choose the size that suits you best – prior to purchasing the screen. Here we are going to outline a few recommendations and some criteria that should be taken into account in order to determine the most suitable size of screen.
It is therefore impossible to establish an exact rule to determine the size of your projection screen. The most effective solution therefore remains to install your video projector and test several image sizes directly on the wall, in order to choose the size that suits you best – prior to purchasing the screen. Here we are going to outline a few recommendations and some criteria that should be taken into account in order to determine the most suitable size of screen.
- Projection ratio. One of the important characteristics of a projector is its projection ratio, which is the projection distance divided by the width of the image. This means that, at a given distance, you will achieve an image (min and max, which can be adjusted using the zoom. For example, if the projector has a ratio that can be adjusted from 1.9 - 2.2 and is positioned 4 metres from the wall, your image will have a minimum width of 1.82 m (4 /2.2) and a maximum width of 2.10 m (4 /1.9)
- Resolution. A video projector has another fundamental characteristic, which is its native resolution. This refers to the number of pixels of the projected image, expressed in terms of columns x rows. The greater the quantity of pixels, the greater the resolution. The most common resolutions are: XGA 1024x768 pixels, WXGA 1280x720 pixels, FULL HD 1920x1080 pixels, WUXGA (1920x1200 pixels).
- Output (lumens). You must also take the device’s output into account: the further the video projector is from the projection screen, the greater the required output in order to achieve a good picture. If used exclusively as a home cinema, in the dark, an output between1000 and 2000 lumens may be sufficient at a distance of 3-4 m. By taking into account these 3 characteristics, which are linked exclusively to your video projector, you must define the projection distance that allows you to produce a good image resolution, with sufficient brightness.
- Dimensions of the projection wall. Measure the width and height available on your projection wall. Think about leaving space for speakers.
- Projection distance. Determine the distance between the projection wall and the 1st row of viewers. Based on an indicative calculation rule used in projection, the minimum width of the image must be equal to 0.8 x distance. For example, if you are located 3 m from the projection wall, the minimum width of the image should be 2.40m. Once the image size has been defined, check our catalogue to find out the total length of the casing of the selected screen, and check if installation is possible. If not, choose the smaller size (note: our screen dimensions are stated based on the actual image size. In some cases the casings are much longer). If necessary, you should also consider the width of the speakers on either side of the screen.
- Viewing height. Ideally, the bottom of the screen should be between 80 and 120 cm from the floor. If your ceiling is too high, you can choose a screen with black drop.
Step 4 - Type of canvas
You can choose between several types of canvas. Each type of canvas is tailored towards a particular type of use, and a specific define.
The projection gain is the capacity of a canvas to reflect light. The higher the gain, the more light is reflected. A high gain can be useful in certain instances, but is not advised in others.
A canvas having high gain does not, under any circumstances, mean that it is better than a low-gain canvas.
Each type of canvas is intended for a very specific use. The gain of the canvas and the output of the video projector are two directly linked characteristics.
Here are some user tips:
- For home cinema use in a dark room: canvas with a gain of 1 with a video projector with an output of 1000 to 2000 lumens (depending on the size of the image and the projection distance),
- For use in ambient light (companies, meetings): canvas with a gain of 1 with a video projector with an output of 2000 to 4000 lumens (depending on the size of the image and the projection distance),
- For large format professional use (conferences, exhibitions): a canvas with a gain of 1, or a canvas with a high gain of 2.5, with a video projector with an output of more than 4000 lumens (output to be determined depending on the size of the image and the projection distance).
Our team is available should you require any information and will be happy to support you in your projects.
How to choose your projection screen?
Often considered a secondary accessory, the projection screen plays an essential role in producing bright images with clear contrast. The projection screen must be selected and considered with the same degree of care and attention as the video projector itself, in order that you can be certain that its installation will function optimally. The screen plays an essential role in determining the final projection quality. Depending on your budget, it is often wise to select a less expensive model of video projector, accompanied by a good quality screen, rather than a very good video projector without a screen; projected onto a wall.
We are going guide you in the selection of your projection screen in 4 STEPS:
We are going guide you in the selection of your projection screen in 4 STEPS:
- Type of screen: manual, motorised, tensioned, built-in, in a frame, whiteboard, portable…
- Projection format: 16/10, 16/9, 4/3, 2/1 and 1/1,
- Screen dimensions: defining the size of the image properly,
- Type of canvas.
Category:
Step 1 - Type of screen
Depending on your requirements and your budget, there are several types of projection screen available.
A manual screen is a roll-down solution that is fixed to the wall and/or ceiling. Uses: private individuals, professionals (offices, schools…)
There are 3 types of manual screen:
> Simple manual screen: the canvas locks in the lowest position by means of a hook attached to the wall. The height of the screen is not adjustable.
> Manual Autolock screen: the canvas automatically locks at the desired height (without the use of a hook on the wall). The height of the screen is therefore adjustable. The locking of the screen requires manual intervention.
> Manual Autolock screen + SRC (slow return control system): the canvas locks automatically at the desired height (without the use of a hook on the wall). The height of the screen is therefore adjustable. The additional advantage is that the closing away of the screen becomes automatic. This optional system is called SRC (Slow Return Control). In fact, a simple flick of your wrist at the bottom of the screen and your canvas will slowly close automatically, without any further intervention on your part. This type of screen is slightly more expensive than the first two, however, ultimately what you get is increased reliability and comfort..
Advantages: economical, simple installation, no cable.
* Non-tensioned screens are naturally susceptible to curling at the edges. A maximum tolerance of 3% of the total width of each of the sides is accepted.
There are 3 types of manual screen:
> Simple manual screen: the canvas locks in the lowest position by means of a hook attached to the wall. The height of the screen is not adjustable.
> Manual Autolock screen: the canvas automatically locks at the desired height (without the use of a hook on the wall). The height of the screen is therefore adjustable. The locking of the screen requires manual intervention.
> Manual Autolock screen + SRC (slow return control system): the canvas locks automatically at the desired height (without the use of a hook on the wall). The height of the screen is therefore adjustable. The additional advantage is that the closing away of the screen becomes automatic. This optional system is called SRC (Slow Return Control). In fact, a simple flick of your wrist at the bottom of the screen and your canvas will slowly close automatically, without any further intervention on your part. This type of screen is slightly more expensive than the first two, however, ultimately what you get is increased reliability and comfort..
Advantages: economical, simple installation, no cable.
* Non-tensioned screens are naturally susceptible to curling at the edges. A maximum tolerance of 3% of the total width of each of the sides is accepted.
The motorised screen is a solution that rolls down electrically and is controlled by a remote control or wall switch. The motorised projection screen is also attached to the wall and/or ceiling. Uses: private individuals, professionals (offices, schools…)
> Tubular motor: the tubular motor is quieter and more reliable than a synchronised motor.
> RF (Radio Frequency) or IR (Infra Red) remote control: an RF remote control is more practical as you do not have to point the transmitter in order to activate the motor.
> Casing (metallic part containing the canvas and motor) black or white, to suit varying installations.
Advantages: simple control, precise adjustment, different sizes possible, up to very large dimensions.
* Non-tensioned screens are naturally susceptible to curling at the edges. A maximum tolerance of 3% of the total width of each of the sides is accepted.
> Tubular motor: the tubular motor is quieter and more reliable than a synchronised motor.
> RF (Radio Frequency) or IR (Infra Red) remote control: an RF remote control is more practical as you do not have to point the transmitter in order to activate the motor.
> Casing (metallic part containing the canvas and motor) black or white, to suit varying installations.
Advantages: simple control, precise adjustment, different sizes possible, up to very large dimensions.
* Non-tensioned screens are naturally susceptible to curling at the edges. A maximum tolerance of 3% of the total width of each of the sides is accepted.
If you want to integrate the screen and make the installation as discrete as possible, then a version with a recessed casing is what you are looking for.
Uses: private individuals (Home Cinema), professionals (offices, meeting rooms…)
What’s more, you also provide the motor and the canvas with optimal protection from all environmental contamination (dust, smoke, heat...). The recessed screen and tensioned recessed screen are perfectly suited for home cinemas.
The casing is fixed to the ceiling with threaded rods. Using the radio frequency remote control, you will have no problem controlling the lowering and raising of the canvas. A precision installation is essential. We recommend that the installation be performed by two people (or that you call in a professional). To facilitate maintenance, side flaps grant access to the electrical connectors.
Advantages: aesthetic appearance, precise adjustment, simple control
* Non-tensioned screens are naturally susceptible to curling at the edges. A maximum tolerance of 3% of the total width of each of the sides is accepted.
Uses: private individuals (Home Cinema), professionals (offices, meeting rooms…)
What’s more, you also provide the motor and the canvas with optimal protection from all environmental contamination (dust, smoke, heat...). The recessed screen and tensioned recessed screen are perfectly suited for home cinemas.
The casing is fixed to the ceiling with threaded rods. Using the radio frequency remote control, you will have no problem controlling the lowering and raising of the canvas. A precision installation is essential. We recommend that the installation be performed by two people (or that you call in a professional). To facilitate maintenance, side flaps grant access to the electrical connectors.
Advantages: aesthetic appearance, precise adjustment, simple control
* Non-tensioned screens are naturally susceptible to curling at the edges. A maximum tolerance of 3% of the total width of each of the sides is accepted.
Motorised projection screens referred to as “tensioned” or “self-tensioning” are also attached to the wall or ceiling. Uses: Home Cinema.
The features (motor, remote control, black drop) are the same as for classic motorised screens. However, they offer one additional advantage.
Tensioned motorised screens incorporate an automatic canvas tensioning system. They have a cable on either side of the screen that tensions the canvas and thus eliminates any potential risk of rippling. The projected image will thus be of better quality than with a manual or classic motorised screen. The canvas is different to that of a classic motorised screen.
It is finer and more flexible in order to be brought to as high a tension as possible, for a superior image quality. On the other hand, you can choose a black casing, which is ideal in a dark room dedicated to projection, without any risk of reflecting the lights, thus interfering with the projection. These “tensioned” motorised screens are highly sought after amongst home cinema enthusiasts.
With or without a black drop? The black drop (or extra drop) is the black band above the projection area, generally measuring between 30 and 70 cm, which enables the screen to be made compatible with different room heights, and the lowering of the centre of your image. This is an option that can prove very useful if you have a high ceiling. We also have all-white canvas screens for multi-format images. Utilisations : Home Cinéma.
The features (motor, remote control, black drop) are the same as for classic motorised screens. However, they offer one additional advantage.
Tensioned motorised screens incorporate an automatic canvas tensioning system. They have a cable on either side of the screen that tensions the canvas and thus eliminates any potential risk of rippling. The projected image will thus be of better quality than with a manual or classic motorised screen. The canvas is different to that of a classic motorised screen.
It is finer and more flexible in order to be brought to as high a tension as possible, for a superior image quality. On the other hand, you can choose a black casing, which is ideal in a dark room dedicated to projection, without any risk of reflecting the lights, thus interfering with the projection. These “tensioned” motorised screens are highly sought after amongst home cinema enthusiasts.
With or without a black drop? The black drop (or extra drop) is the black band above the projection area, generally measuring between 30 and 70 cm, which enables the screen to be made compatible with different room heights, and the lowering of the centre of your image. This is an option that can prove very useful if you have a high ceiling. We also have all-white canvas screens for multi-format images. Utilisations : Home Cinéma.
Framed screens are a fixed solutions intended for installation on a wall, like a picture. This type of screen with a fixed frame is designed to be installed in a room that is dedicated exclusively to projection, both at home and in the office. Uses: Home cinema, meeting room
Advantage: the screen is always ready for use and the entire installation is aesthetically pleasing. The sides of the frame are made of aluminium and are generally covered in black velvet (the use of black velvet prevents the image from being reflected on the edges of the frame during projection, which can be very annoying). The width of the black frame varies between 86 cm and 6.5 cm for standard frames, and as small as 1.8 cm for the range of ultra-fine screens, also referred to as Slim screens.
The canvas is perfectly flat, for unparalleled image quality. The canvas is different to that of a classic screen, and is identical to that found on tensioned motorised screens. It is finer and more supple, so that it can be easily tensioned. This tension is exerted by springs located inside the frame, and all the way around the canvas. A frame screen thus enables a perfectly flat screen, with no ripples whatsoever.
The frame screen remains the best solution compared to the other types of screen presented above. However, its size and the fact that it is permanently visible require a room dedicated especially to projection. Frame screens are also highly appreciated by lovers of home cinema, and are increasingly being used within a professional setting.
Advantage: the screen is always ready for use and the entire installation is aesthetically pleasing. The sides of the frame are made of aluminium and are generally covered in black velvet (the use of black velvet prevents the image from being reflected on the edges of the frame during projection, which can be very annoying). The width of the black frame varies between 86 cm and 6.5 cm for standard frames, and as small as 1.8 cm for the range of ultra-fine screens, also referred to as Slim screens.
The canvas is perfectly flat, for unparalleled image quality. The canvas is different to that of a classic screen, and is identical to that found on tensioned motorised screens. It is finer and more supple, so that it can be easily tensioned. This tension is exerted by springs located inside the frame, and all the way around the canvas. A frame screen thus enables a perfectly flat screen, with no ripples whatsoever.
The frame screen remains the best solution compared to the other types of screen presented above. However, its size and the fact that it is permanently visible require a room dedicated especially to projection. Frame screens are also highly appreciated by lovers of home cinema, and are increasingly being used within a professional setting.
PORTABLE SCREENS
Portable screens are designed to be used during a one-off audiovisual presentation, and can be set up and taken down quickly. Depending on the type of service, the desired size of screen and your budget, various types of portable screen are available:
Portable screens are designed to be used during a one-off audiovisual presentation, and can be set up and taken down quickly. Depending on the type of service, the desired size of screen and your budget, various types of portable screen are available:
> Tripod screen: the tripod screen is the most economical.
Advantages: economical, instant setup, Highly mobile (cover available), different sizes and formats possible.
Advantages: economical, instant setup, Highly mobile (cover available), different sizes and formats possible.
> Pull-up screen: the canvas is rolled inside its carry case. Place the casing on the floor, pull the canvas . It stays up by itself.
Advantages: the setup of the screen is extremely simple and instantaneous. In addition, the height of the screen is adjustable, and it locks at the desired height.
Advantages: the setup of the screen is extremely simple and instantaneous. In addition, the height of the screen is adjustable, and it locks at the desired height.
> Case screen: case screen supplied with its own transport case: it consists of an aluminium structure onto which the canvas is fastened with press studs. Once dismantled, the entire screen is stored inside its case.
Advantages: this screen is available for FRONT or REAR projection. In addition, it allows you to produce very large images(up to 6 metres wide). Flatness of the canvas, height-adjustable. Variety of formats.
Advantages: this screen is available for FRONT or REAR projection. In addition, it allows you to produce very large images(up to 6 metres wide). Flatness of the canvas, height-adjustable. Variety of formats.
Step 2 - Projection format
The format is the ratio between the width and the height of the image. For example, for an image that is 2 metres wide, if the format is 16:9 then the height will be 1.13m (image dimensions: 2 x 1.13m). To achieve a better result, it is recommended that you use a screen with the same format as the projected image. There are different projection formats:
16:10 Computer format, for office use.
16:9 Home cinema use and high-definition TV. 16:9 has become the current stands, and most-used, format.
4:3 For mixed use.
2:1 for office use.
1:1 for versatile use (institutions, education, companies…). Depending on the unrolled height, all formats are possible.
CALCULATION EXAMPLE FOR THE PROJECTION DISTANCE
Before purchasing your equipment, it is important to define the size of the image based on your video projector and the projection distance, or, inversely, the projection distance based on your image size and your video projector.
Minimum projection distance = image width x minimum ratio = 3 x 1.95 = 5.85 m
Maximum projection distance = image width x maximum ratio= 3 x 2.15 = 6.45 m
16:10 Computer format, for office use.
16:9 Home cinema use and high-definition TV. 16:9 has become the current stands, and most-used, format.
4:3 For mixed use.
2:1 for office use.
1:1 for versatile use (institutions, education, companies…). Depending on the unrolled height, all formats are possible.
CALCULATION EXAMPLE FOR THE PROJECTION DISTANCE
Before purchasing your equipment, it is important to define the size of the image based on your video projector and the projection distance, or, inversely, the projection distance based on your image size and your video projector.
Minimum projection distance = image width x minimum ratio = 3 x 1.95 = 5.85 m
Maximum projection distance = image width x maximum ratio= 3 x 2.15 = 6.45 m
CALCULATION EXAMPLE FOR THE SIZE OF THE SCREEN
Minimum image width = projection distance / maximum ratio = 4 / 2.15 = 1.86 m
Maximum image width = projection distance / minimum ratio = 4 / 1.95 = 2.05 m
TYPE OF PROJECTION FRONT: the video projector is placed in front of the canvas
REAR: the video projector is placed behind the canvas (if used as part of a set, for example). A translucent grey canvas is used in this case.
Minimum image width = projection distance / maximum ratio = 4 / 2.15 = 1.86 m
Maximum image width = projection distance / minimum ratio = 4 / 1.95 = 2.05 m
TYPE OF PROJECTION FRONT: the video projector is placed in front of the canvas
REAR: the video projector is placed behind the canvas (if used as part of a set, for example). A translucent grey canvas is used in this case.
Step 3 - Dimensions of the screen
The dimensions of the projection screen will depend on various criteria, such as: the resolution of your video projector and its power, the dimensions of your projection room, the distance at which the viewers are located, and your personal comfort (for example, in a cinema some people like to sit further forward than others).
It is therefore impossible to establish an exact rule to determine the size of your projection screen. The most effective solution therefore remains to install your video projector and test several image sizes directly on the wall, in order to choose the size that suits you best – prior to purchasing the screen. Here we are going to outline a few recommendations and some criteria that should be taken into account in order to determine the most suitable size of screen.
It is therefore impossible to establish an exact rule to determine the size of your projection screen. The most effective solution therefore remains to install your video projector and test several image sizes directly on the wall, in order to choose the size that suits you best – prior to purchasing the screen. Here we are going to outline a few recommendations and some criteria that should be taken into account in order to determine the most suitable size of screen.
- Projection ratio. One of the important characteristics of a projector is its projection ratio, which is the projection distance divided by the width of the image. This means that, at a given distance, you will achieve an image (min and max, which can be adjusted using the zoom. For example, if the projector has a ratio that can be adjusted from 1.9 - 2.2 and is positioned 4 metres from the wall, your image will have a minimum width of 1.82 m (4 /2.2) and a maximum width of 2.10 m (4 /1.9)
- Resolution. A video projector has another fundamental characteristic, which is its native resolution. This refers to the number of pixels of the projected image, expressed in terms of columns x rows. The greater the quantity of pixels, the greater the resolution. The most common resolutions are: XGA 1024x768 pixels, WXGA 1280x720 pixels, FULL HD 1920x1080 pixels, WUXGA (1920x1200 pixels).
- Output (lumens). You must also take the device’s output into account: the further the video projector is from the projection screen, the greater the required output in order to achieve a good picture. If used exclusively as a home cinema, in the dark, an output between1000 and 2000 lumens may be sufficient at a distance of 3-4 m. By taking into account these 3 characteristics, which are linked exclusively to your video projector, you must define the projection distance that allows you to produce a good image resolution, with sufficient brightness.
- Dimensions of the projection wall. Measure the width and height available on your projection wall. Think about leaving space for speakers.
- Projection distance. Determine the distance between the projection wall and the 1st row of viewers. Based on an indicative calculation rule used in projection, the minimum width of the image must be equal to 0.8 x distance. For example, if you are located 3 m from the projection wall, the minimum width of the image should be 2.40m. Once the image size has been defined, check our catalogue to find out the total length of the casing of the selected screen, and check if installation is possible. If not, choose the smaller size (note: our screen dimensions are stated based on the actual image size. In some cases the casings are much longer). If necessary, you should also consider the width of the speakers on either side of the screen.
- Viewing height. Ideally, the bottom of the screen should be between 80 and 120 cm from the floor. If your ceiling is too high, you can choose a screen with black drop.
Step 4 - Type of canvas
You can choose between several types of canvas. Each type of canvas is tailored towards a particular type of use, and a specific define.
The projection gain is the capacity of a canvas to reflect light. The higher the gain, the more light is reflected. A high gain can be useful in certain instances, but is not advised in others.
A canvas having high gain does not, under any circumstances, mean that it is better than a low-gain canvas.
Each type of canvas is intended for a very specific use. The gain of the canvas and the output of the video projector are two directly linked characteristics.
Here are some user tips:
The projection gain is the capacity of a canvas to reflect light. The higher the gain, the more light is reflected. A high gain can be useful in certain instances, but is not advised in others.
A canvas having high gain does not, under any circumstances, mean that it is better than a low-gain canvas.
Each type of canvas is intended for a very specific use. The gain of the canvas and the output of the video projector are two directly linked characteristics.
Here are some user tips:
- For home cinema use in a dark room: canvas with a gain of 1 with a video projector with an output of 1000 to 2000 lumens (depending on the size of the image and the projection distance),
- For use in ambient light (companies, meetings): canvas with a gain of 1 with a video projector with an output of 2000 to 4000 lumens (depending on the size of the image and the projection distance),
- For large format professional use (conferences, exhibitions): a canvas with a gain of 1, or a canvas with a high gain of 2.5, with a video projector with an output of more than 4000 lumens (output to be determined depending on the size of the image and the projection distance).